
With a GPIO Expander you can have the flexibility to add new features to your product.
In electronic product design, a popular method is to add a GPIO Expander on an I2C bus. Many peripheral ICs, e.g. ADC, DAC, EEPROM etc., can then be attached to the bus. Most of these peripherals can then use the GPIO Expander to provide additional GPIO for control / status e.g. BUSY, Write Protect, Channel Selection, Reset etc.
Other examples where a GPIO Expander can provide additional GPIO include:
- Adding buttons or a keypad.
- Adding LED indicators.
- Selecting address lines
- LCD Character Display
- Etc.
These are just some embedded design examples of where a GPIO expander can come to the rescue!
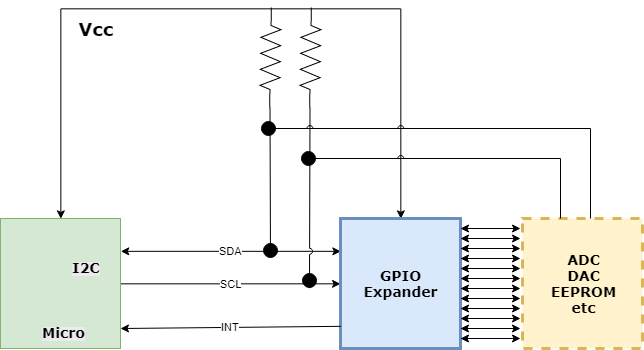
Figure 1: General I2C GPIO Expander Circuit
GPIO Expander I2C Bus
- 2 pins ( SDA and SCL ).
- Writes/Reads to GPIO expander
- Configures pins as inputs / outputs / open-drain outputs
- Configures pull-up / pull-down resistors on configured inputs
- Sets outputs high or low
- Reads inputs
GPIO Expander INT pin
- 1 pin
- Interrupts micro if change on inputs of GPIO Expander
Examples of using a GPIO Expander
1/ Higher Current LEDs Example
The higher current drive capability of the GPIO expander allows you to drive additional LEDs.
Eg. Microchips 16-bit GPIO Expander MCP23018 can sink 25mA per pin.
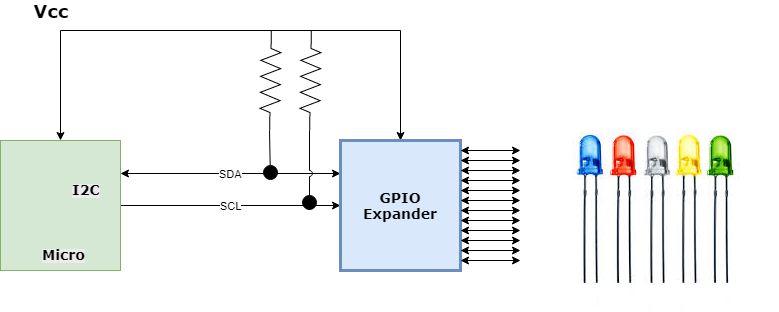
Figure 2: Drive higher current LEDs
2/ Low Power Keypad Example
You can attach a keypad to the GPIO Expander with no need for the micro to continuously check whether a key has been pressed or not. The GPIO Expander I/O can be configured that it will interrupt the processor using the INT pin whenever a key is pressed. In a battery powered product, the micro could be asleep, with the INT pin waking it up whenever a key is pressed.
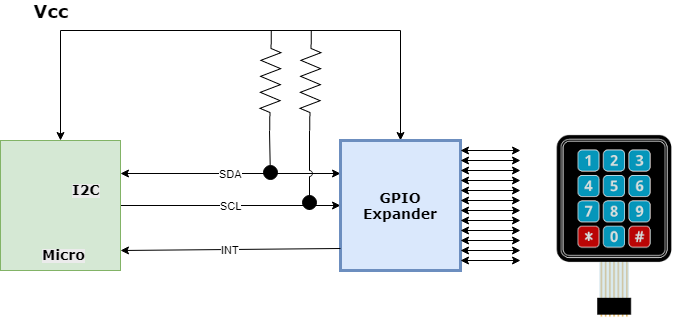
Figure 3: Add a keypad
3/ LCD Display Example
You can easily attach an LCD character display using a GPIO Expander. Normally you would need 4 data lines and 2 control lines to interface to the LCD. With the GPIO expander connected to the LCD, you only need the 2 I2C lines to control the display. The INT line does not need to be used for the display but you may want it if you also add buttons or a keypad.
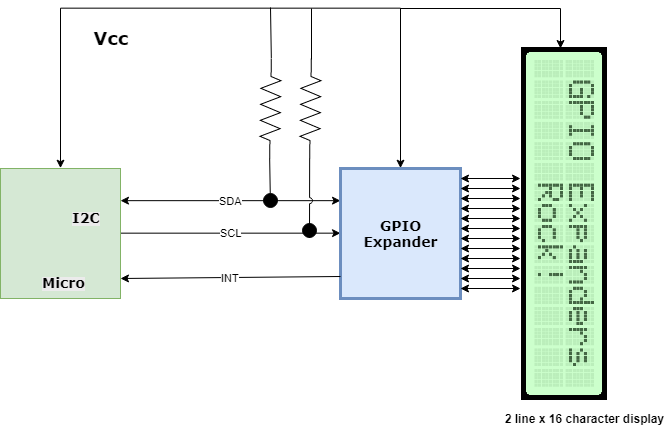
Figure 4: Add a 2 line x 16 character LCD display
4/ Example of Interfacing between 2 systems running at different voltages
We may need to add a 3.3V peripheral to a 1.8V system, or a 5V system to a 3.3V system. You can get GPIO Expanders that run off dual voltages to facilitate this.
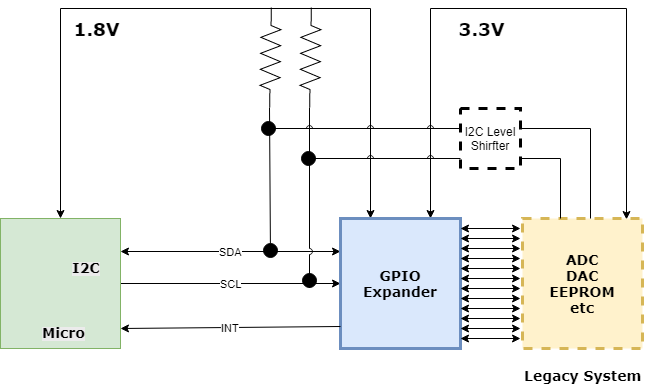
Figure 5: 1.8V system interfacing to legacy 3.3V system
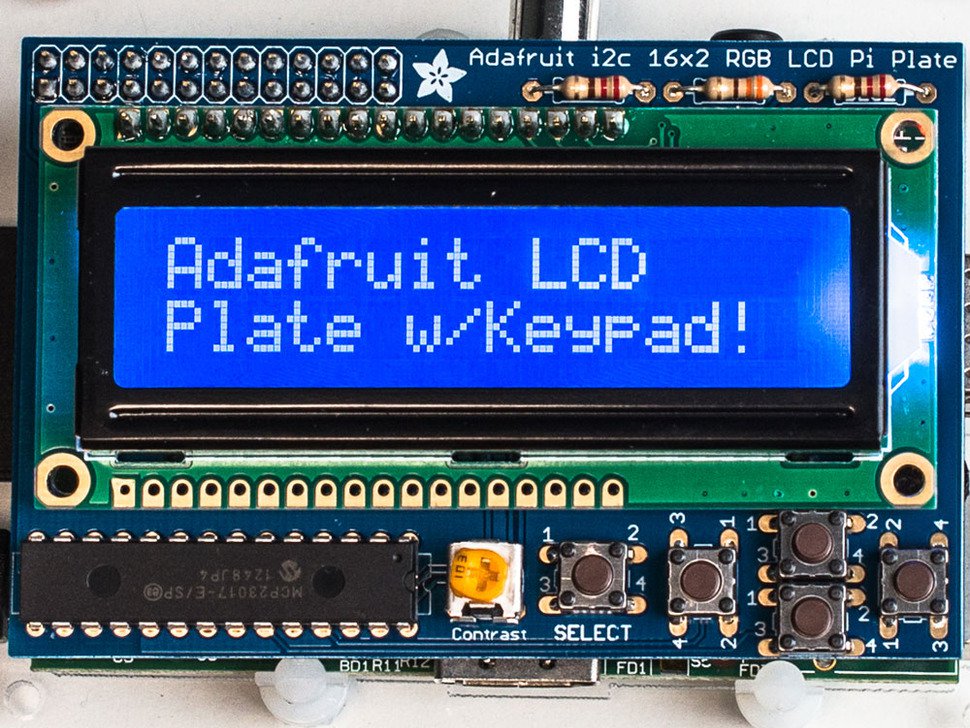
5/ Example Product
A good example of the use of an GPIO Expander allowing a display and keypad to be attached over the I2C bus is Adafruit’s 16×2 LCD + Keypad Kit for Raspberry Pi which uses Microchip’s MCP23017
Summary
Use an I2C GPIO Expander to make it easy to add extra features and functionality.
You can easily change your PCB routing as there are only 2 or 3 connections that need to be made.
Most semiconductor manufacturers offer I2C GPIO expanders.
To explore further, some examples are: